How to create a design moodboard
The key to creating an aesthetically pleasing space that incorporates all of your desired design elements is taking the time to plan and gather inspiration beforehand. Transferring all of your ideas onto a mood board really helps to bring your thoughts to life, and really allows you to see what works. If you’re thinking of sprucing up your space, first take some time to envision how you’d like it to look, considering colours and textures.

Online or print mood board?
Modern day technology provides us with the tools to create incredibly in-depth mood boards, offering various templates that we can use to input images and colours that we like. Canva and Niice are great tools to explore, providing the user with a blank slate, upon which they can combine various media assets to create a visual board.
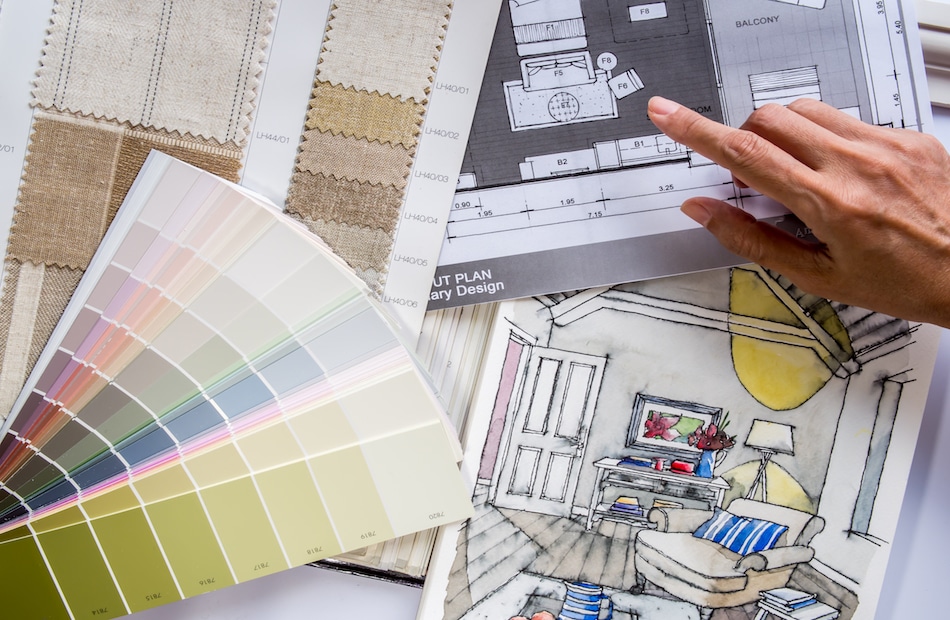
Those who like to keep it traditional might prefer to create a mood board by hand, which can actually work better if you’re looking to incorporate tangible elements that vary in texture. You can really go to town, incorporating newspaper/magazine cut-outs, photos that you’ve taken and printed or material samples.
You’ll need to decide which route you’re going to take before you get started, so have a think about which style of mood board will best suit your project.
Be open minded
Before you start creating your mood board, try and be creative in obtaining your materials – take a camera with you on your travels, for example, as you may come across some inspirational photography opportunities whilst you’re out and about. Similarly, keep your eye out for items or materials that you like – whether that’s post cards, plaques or tags/collector’s items. They might not seem relevant, but being open minded will stretch your imagination.

Gather your equipment
If you’re creating your mood board by hand, you’ll need a canvas. If you’re looking to create a basic one, some card will suffice (A3/A2/A1 sizing will depend on how large you want to make it). You can use glue or tape to stick down your materials, layering and overlapping to help you visualise how your individual ideas will look when combined. If you take this approach, be sure to sketch out a rough template and play around with the layout first, before you stick them down.

If you’re looking to create a larger mood board, try using a foam base before covering it with a material that you like. You can then use board pins to stick down your materials, which you can then move around as you see fit. Try using an equal mix of images, materials and colour swatches to really get your creative juices flowing.

However you decide to approach the creation of your mood board, ensuring that you have a vague idea of the colours and textures you like will help you get off to a strong start. At Cobus, our design team work to bring your ideas to life – taking the mood board and transforming it into real-life design. To speak to a member of our team, see here.